Integrating Azure BLOB Storage into APEX
Oracle eBusiness Suite Techno Functional Consultant since the last century. Passionate about utilising Oracle APEX to integrate and extend EBS.
Introduction
With cheap cloud storage, it makes sense to store your BLOBs in a cloud service instead of in your database tables. In this article, I'll take you through creating some plugins to allow you to upload, download and delete BLOBs from Azure BLOB Storage.
To look at a similar setup on OCI, check out this great post by Jon Dixon Using Oracle Storage Cloud Service for APEX BLOBS - JMJ CLOUD.
This post isn't a guide to developing Plug-ins just an overview of how to write Azure BLOB storage plugins. Please read my previous post, Creating an APEX Process Plugin, for the basics of plug-in development.
Azure Prerequisites
Azure subscription in place and Storage container created. Sign up here for a 12-month free trial of certain Azure services including BLOB storage.
Instructions on setting up a storage container can be found at Manage blob containers using the Azure portal - Azure Storage | Microsoft Learn
Setting up the Azure SAS Token
The following steps are based on those in the official Microsoft guide
Sign in to the Azure portal.
Navigate to Your storage account > containers > your container.
Select Generate SAS from the menu near the top of the page.
Select Signing method → Account key.
Define Permissions by selecting or clearing the appropriate checkbox.
Make sure the Read, Write, Delete, and List permissions are selected.
| Operation | Signed permission | | --- | --- | | Put Blob (create new block blob) | Create (c) or Write (w) | | Put Blob (overwrite existing block blob) | Write (w) | | Delete Blob | Delete (d) | | Get Blob | Read (r) | | List Blobs | List (l) |

Specify the signed key Start and Expiry times.
The Allowed IP addresses field is optional and specifies an IP address or a range of IP addresses from which to accept requests. If the request IP address doesn't match the IP address or address range specified on the SAS token, authorization fails. The IP address or a range of IP addresses must be public IPs, not private.
The Allowed protocols field is optional and specifies the protocol permitted for a request made with the SAS token. The default value is HTTPS.
Select Generate SAS token and URL.
The Blob SAS token query string and Blob SAS URL appear in the lower area of the window.
Copy and paste the Blob SAS token and Blob SAS URL values in a secure location. They're displayed only once and can't be retrieved after the window is closed.
Now we have our SAS token we can get into APEX and create some plug-ins to play with and reuse throughout our apps.
Developing the plug-in
Why a plug-in?
Plug-ins are designed for reuse, developers can export and import them to other workspaces and also share them with the Oracle APEX Plug-in community by using the Plug-in Repository.
Like many APEX components, plug-ins can be copied from one application to another and even better copied and subscribed to, allowing the plug-in to be maintained in one app and used by many.
Supporting Database Objects
AZURE_FILES Table
A local database table will be used to store the details of our remotely stored BLOBs.
| Name | Null? | Type | Comments |
| FILE_ID | NOT NULL | NUMBER | Primary Key, populated from a sequence |
| REF_OBJECT_TYPE | NOT NULL | VARCHAR2(30 CHAR) | The Reference Object Type, ie AP_INVOICES_ALL |
| REF_OBJECT_ID | NOT NULL | NUMBER | The Reference Object ID,for example the primary key of the table used in the REF_OBJECT_TYPE |
| FILENAME | NOT NULL | VARCHAR2(400 CHAR) | User visible Filename |
| MIME_TYPE | NOT NULL | VARCHAR2(255 CHAR) | Mimetype of file |
| FILE_SIZE | NOT NULL | NUMBER | Filesize of file |
| AZURE_FILENAME | NOT NULL | VARCHAR2(450 CHAR) | Name of the filename in Azure, needs to be unique |
| DELETE_AFTER_DATE | DATE | Date after which the file will be eligible for deletion | |
| DELETED | NOT NULL | VARCHAR2(1 CHAR) | Y/N of whether the file has been deleted |
| DELETED_DATE | DATE | Date file Deleted | |
| DELETED_BY | VARCHAR2(100 CHAR) | Username of the Deletor | |
| CREATED_BY | NOT NULL | VARCHAR2(100 CHAR) | User who uploaded the BLOB |
| CREATED_DATE | NOT NULL | DATE | Date BLOB uploaded |
  CREATE TABLE "AZURE_FILES"
   (    "FILE_ID" NUMBER AS IDENTITY NOT NULL ENABLE,
    "REF_OBJECT_TYPE" VARCHAR2(30 CHAR) NOT NULL ENABLE,
    "REF_OBJECT_ID" NUMBER NOT NULL ENABLE,
    "FILENAME" VARCHAR2(400 CHAR) NOT NULL ENABLE,
    "MIME_TYPE" VARCHAR2(255 CHAR) NOT NULL ENABLE,
    "FILE_SIZE" NUMBER NOT NULL ENABLE,
    "AZURE_FILENAME" VARCHAR2(450 CHAR) NOT NULL ENABLE,
    "DELETE_AFTER_DATE" DATE,
    "DELETED" VARCHAR2(1 CHAR) NOT NULL ENABLE,
    "DELETED_DATE" DATE,
    "DELETED_BY" VARCHAR2(100 CHAR),
    "CREATED_BY" VARCHAR2(100 CHAR) NOT NULL ENABLE,
    "CREATED_DATE" DATE NOT NULL ENABLE,
     CONSTRAINT "AZURE_FILES_PK" PRIMARY KEY ("FILE_ID")
  USING INDEX  ENABLE
   ) ;
AZURE_FILES_S Sequence
Used to populate the File ID.
CREATE SEQUENCE  "AZURE_FILES_S"
MINVALUE 1 MAXVALUE 9999999999999999999999999999
INCREMENT BY 1 START WITH 1
CACHE 20 NOORDER  NOCYCLE  NOKEEP  NOSCALE  GLOBAL ;
AZURE_API_PKG Package
Used to keep the plug-in code in the database, code can be maintained in the plug-in itself but it's good practice to keep it in the database for performance.
Put BLOB
Time to get a BLOB up in the cloud. The first plug-in we'll create is to upload a BLOB to the cloud. Notes on the REST service can be found here.
The plug-in stores the Azure SAS URL as a component setting and the second custom attribute will be a list of filenames that need to be uploaded. The list of filenames will be stored in a page item that is set as File Browser type, where the storage type is set to APEX_APPLICATION_TEMP_FILES. The code will then take the filenames, loop through them and upload to Azure. Inserting into the AZURE_FILES table as it goes.
Read code comments for insight into what is happening.
FUNCTION put_blob (p_process IN apex_plugin.t_process,
                   p_plugin  IN apex_plugin.t_plugin)
RETURN apex_plugin.t_process_exec_result
AS
  -- Process attributes
  l_file_name_list    p_process.attribute_01%TYPE := p_process.attribute_01;
  l_ref_object_type   p_process.attribute_02%TYPE := p_process.attribute_02;
  l_ref_object_id     p_process.attribute_03%TYPE := p_process.attribute_03;
  l_delete_after_date p_process.attribute_04%TYPE := p_process.attribute_04;
  -- Plugin attributes
  l_azure_sas_url     p_plugin.attribute_01%TYPE := p_plugin.attribute_01;
  -- Other Locals
  l_result            apex_plugin.t_process_exec_result;
  l_error_count       NUMBER := 0;
  l_file_names        APEX_T_VARCHAR2;
  l_file              apex_application_temp_files%ROWTYPE;
  l_url               VARCHAR2(1000);
  l_clob              CLOB;
  l_file_id           NUMBER;
  l_filename          VARCHAR2(450);
BEGIN
    -- Call procedure to split SAS URL to base URL and Token
    Set_globals(l_azure_sas_url);
    -- Split colon delimited string of filenames into a table of filenames
    l_file_names := apex_string.Split (p_str => l_file_name_list, p_sep => ':');
    -- loop through filenames
    FOR i IN 1 .. l_file_names.count LOOP
        -- populate temporary record of BLOB
        SELECT *
        INTO   l_file
        FROM   apex_application_temp_files
        WHERE  name = L_file_names(i);
        -- assign next sequence number
        l_file_id := azure_files_s.NEXTVAL;
        -- remove whitespace from filename and append sequence number to make unique in Azure
        l_filename := Replace(l_file.filename, ' ', '_') || '_' || l_file_id;
        -- construct REST URL
        l_url := g_base_url || '/' || l_filename || g_sas;
        -- Set Request Headers
        apex_web_service.Set_request_headers(p_name_01 => 'x-ms-blob-type',
                                            p_value_01 => 'BlockBlob',
                                            p_name_02 => 'Content-Type',
                                            p_value_02 => l_file.mime_type,
                                            p_name_03 => 'x-ms-version',
                                            p_value_03 => '2022-11-02');
        -- Make PUT REST Request, passing BLOB in the body
        l_clob := apex_web_service.Make_rest_request(p_url => l_url,
                                                     p_http_method => 'PUT',
                                                     p_body_blob => l_file.blob_content);
        -- Check Response
        IF apex_web_service.g_status_code = 201 THEN  -- Success
            --Append Success Message
            l_result.success_message := l_result.success_message ||'Filename: ' || l_file.filename || ' uploaded. ';
            --Format delete after date, passed as string by plug-in
            l_delete_after_date := To_date(l_delete_after_date, 'DD-MON-YYYY');
            --Insert details into local table
            INSERT INTO xx_apex.azure_files
                      (file_id,
                       ref_object_type,
                       ref_object_id,
                       filename,
                       mime_type,
                       file_size,
                       azure_filename,
                       delete_after_date,
                       created_by,
                       created_date,
                       deleted)
            VALUES      ( l_file_id,
                       l_ref_object_type,
                       l_ref_object_id,
                       l_file.filename,
                       l_file.mime_type,
                       Length(l_file.blob_content),
                       l_filename,
                       l_delete_after_date,
                       Nvl(V('APP_USER'), USER),
                       SYSDATE,
                       'N');
        ELSIF apex_web_service.g_status_code >= 400 THEN -- Handled REST Error
            --Append Success Message with Error
            l_result.success_message := l_result.success_message ||'ERROR - Filename: ' || l_file.filename || ' upload failed. ';
            -- increment error count
            l_error_count := l_error_count + 1;
        ELSE  -- Unhandled REST Error
            --Append Success Message with Error
            l_result.success_message := l_result.success_message ||'ERROR - Filename: ' ||l_file.filename  ||' upload failed. ';
            -- increment error count
            l_error_count := l_error_count + 1;
        END IF;
        -- Delete temp BLOB
        DELETE FROM apex_application_temp_files
        WHERE  filename = l_file.filename;
    END LOOP;

    -- Error Handling
    IF l_error_count > 0 THEN
      Raise_error('Error Uploading some files, check debug log and retry or Contact Suppport');
END IF;

RETURN l_result;
EXCEPTION
  WHEN OTHERS THEN
             RAISE;
END put_blob;
Delete BLOB
At some stage, the BLOB may need to be deleted, see REST details here.
The plug-in will delete the file from Azure then update the DELETED flag in AZURE_FILES to Y and store the username and date deleted.
FUNCTION delete_blob (p_process IN apex_plugin.t_process,
                      p_plugin  IN apex_plugin.t_plugin)
RETURN apex_plugin.t_process_exec_result
AS
  -- Process attributes
  l_file_id       p_process.attribute_01%TYPE := p_process.attribute_01;
  -- Plugin attributes
  l_azure_sas_uri p_plugin.attribute_01%TYPE := p_plugin.attribute_01;
  -- Other Locals
  l_result        apex_plugin.t_process_exec_result;
  l_url           VARCHAR2(1000);
  l_clob          CLOB;
  l_filename      VARCHAR2(450);
BEGIN
    -- Call procedure to split SAS URL to base URL and Token
    Set_globals(l_azure_sas_uri);
    -- Get Azure Filename related to File ID
    SELECT azure_filename
    INTO   l_filename
    FROM   azure_files
    WHERE  file_id = l_file_id;
    -- Construct REST URL
    l_url := g_base_url || '/' || l_filename || g_sas;
    -- Make DELETE Rest Request
    l_clob := apex_web_service.Make_rest_request(p_url => l_url,
                                                p_http_method => 'DELETE');
    -- Check Response
    IF apex_web_service.g_status_code = 202 THEN -- Success
        --Set Success Message
        l_result.success_message := 'BLOB Deleted succesfully';
        -- Update local table to record BLOB deleted
        UPDATE xx_apex.azure_files
        SET    deleted = 'Y',
               deleted_date = SYSDATE,
               deleted_by = Nvl(V('APP_USER'), USER)
        WHERE  file_id = l_file_id;
    ELSIF apex_web_service.g_status_code >= 400 THEN  -- Handled REST Error
        --Set Success Message with Error
        l_result.success_message := 'BLOB Delete Failed:' || apex_web_service.g_status_code ||' - ' ||apex_web_service.g_reason_phrase;
    ELSE  -- Unhandled REST Error
        --Set Success Message with Error
        l_result.success_message := 'Unknown error with BLOB Deletion!' || apex_web_service.g_status_code || ' - ' || apex_web_service.g_reason_phrase;
    END IF;

     RETURN l_result;

EXCEPTION
  WHEN OTHERS THEN
             RAISE;
END delete_blob;
Un-Delete BLOB
If your Azure BLOB storage is configured for soft deletes, see the link above for details, then we can un-delete the blob during the configured retention period.
FUNCTION undelete_blob (p_process IN apex_plugin.t_process,
                        p_plugin  IN apex_plugin.t_plugin)
RETURN apex_plugin.t_process_exec_result
AS
  -- Process attributes
  l_file_id       p_process.attribute_01%TYPE := p_process.attribute_01;
  -- Plugin attributes
  l_azure_sas_uri p_plugin.attribute_01%TYPE := p_plugin.attribute_01;
  -- Other Locals
  l_result        apex_plugin.t_process_exec_result;
  l_url           VARCHAR2(1000);
  l_clob          CLOB;
  l_filename      VARCHAR2(450);
BEGIN
    -- Call procedure to split SAS URL to base URL and Token
    Set_globals(l_azure_sas_uri);
    -- Get Azure Filename related to File ID
    SELECT azure_filename
    INTO   l_filename
    FROM   azure_files
    WHERE  file_id = l_file_id;
    -- Construct REST URL
    l_url := g_base_url || '/' || l_filename || g_sas || '&comp=undelete';
    -- Set Request Headers
    apex_web_service.Set_request_headers(p_name_01 => 'x-ms-version',
                                        p_value_01 => '2022-11-02',
                                        p_name_02 => 'Content-Length',
                                        p_value_02 => '0'
                                        );
    -- Make PUT REST Request
    l_clob := apex_web_service.Make_rest_request(p_url => l_url,
                                                p_http_method => 'PUT');
    -- Check Response
    IF apex_web_service.g_status_code = 200 THEN  -- Success
        l_result.success_message := 'BLOB Un-Deleted succesfully';
        -- Update Local table to show BLOB as not deleted
        UPDATE xx_apex.azure_files
        SET    deleted = 'N',
               deleted_date = NULL,
               deleted_by = NULL
        WHERE  file_id = l_file_id;
    ELSIF apex_web_service.g_status_code >= 400 THEN -- Handled REST Error

      l_result.success_message := 'BLOB Delete Failed:' || apex_web_service.g_status_code || ' - ' || apex_web_service.g_reason_phrase;
    ELSE -- Unhandled REST Error
      l_result.success_message := 'Unknown error with BLOB Deletion!' || apex_web_service.g_status_code || ' - ' || apex_web_service.g_reason_phrase;
    END IF;

    RETURN l_result;
EXCEPTION
  WHEN OTHERS THEN
             RAISE;
END undelete_blob;
Get PDF
This function will create an iframe with the PDF on screen.
FUNCTION Get_pdf (p_region              IN apex_plugin.t_region,
                  p_plugin              IN apex_plugin.t_plugin,
                  p_is_printer_friendly IN BOOLEAN)
RETURN apex_plugin.t_region_render_result
IS
  -- Process attributes
  l_filename      p_region.attribute_01%TYPE := p_region.attribute_01;
  -- Plugin attributes
  l_azure_sas_url p_plugin.attribute_01%TYPE := p_plugin.attribute_01;
  -- other vars
  l_result        apex_plugin.t_region_render_result;
--
BEGIN
 -- Call procedure to split SAS URL to base URL and Token
    Set_globals(l_azure_sas_url);
-- Create html
sys.htp.P('<iframe src="'
          ||g_base_url
          ||'/'
          ||l_filename
          ||g_sas
          ||'" type="application/pdf" style="width: 100%; height: 100vh" title="Iframe Example"></iframe>');

RETURN l_result;
END get_pdf;
Set Globals
Private Procedure to split the SAS URL stored as an Application Plug-in setting into a base URL and the SAS Token. Just uses a simple "substr".
PROCEDURE set_globals(p_azure_sas_url VARCHAR2)
AS
BEGIN
    SELECT substr(p_azure_sas_url, 1, instr(p_azure_sas_url, '?') - 1),
           substr(p_azure_sas_url, instr(p_azure_sas_url, '?'))
    INTO   g_base_url, g_sas
    FROM   dual;
END set_globals;
Defining the Plug-ins in APEX
With all the supporting objects in place, we can proceed to create the plug-ins. Detailed below are 4 plug-ins, One to Put a BLOB, one to Delete a BLOB, and another to undelete a BLOB, all of those will be process Plug-ins and finally a fourth plug-in will be a region-type one that will be used to view the PDF on an APEX page.
Put BLOB
Enter the basics, a name, and an internal name and select Process as the type.
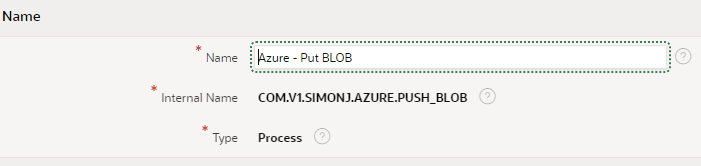
For the Execution Function name, we will just reference the function in the package created earlier.

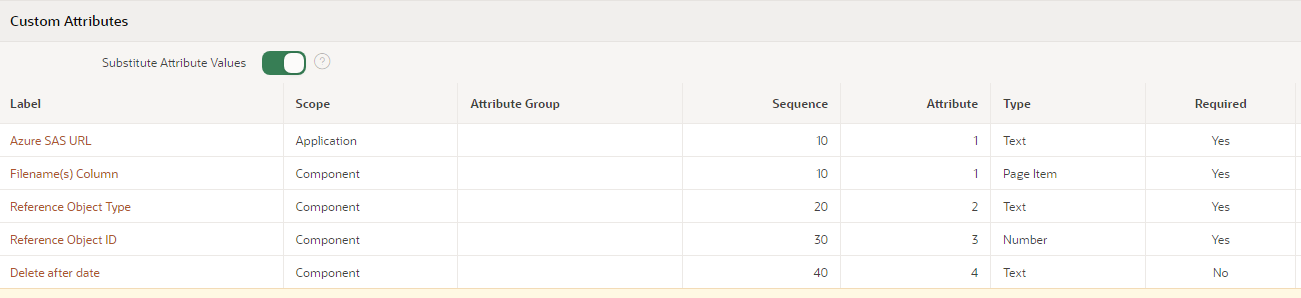
Accept the defaults for everything else and save. We can then add the custom attributes. In all 4 Plug-ins, we will have an application-level custom attribute to store the Azure SAS URL, this means that we will need to enter the value 4 times when configuring the plug-in, and an improvement to this would be to store the SAS token separately as a web credential and the Azure SAS base path as an application item. And modify the code to use those instead.
For the Post BLOB plug-in, we have four additional Component-level attributes, the Filename Column, use will select a page item used to store a colon-delimited list of filenames for upload. The Reference Object Type would generally be hardcoded by the developer based on the plug-in usage and the Reference Object ID would come from a page item used to store the primary key of the record the BLOB is to be referenced by. I've also included a "Delete after Date" which can be null or populated with a date value, this would be used to call the Delete BLOB plug-in from an automation as a housekeeping task, ie delete all files with a delete after date before sysdate. I'll make another post on the setup of the automation task for that in the future.
Once the plug-in is set up, populate the component settings for the plug-in with the Azure SAS URL

Now we can add the plug-in to a page and test the upload.
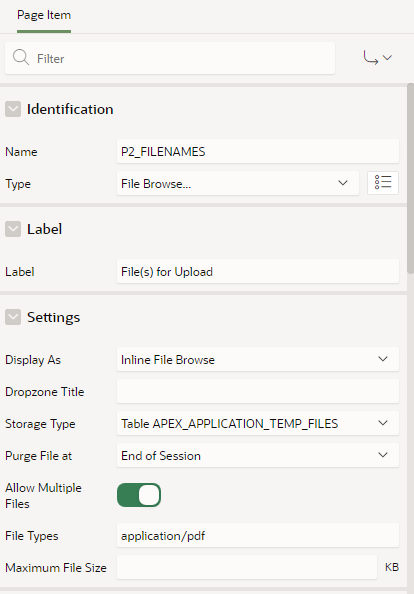
Create a new blank page and add a page item of type File Browser. Give it a name, ie files for upload. To restrict uploaded file types to pdf we can enter application/pdf in the filetype field, in this use case we are going to do just that. Also set the Allow Multiple files to Yes, to allow users to upload multiple files at a time.
Next, add a button to submit the page and upload the files
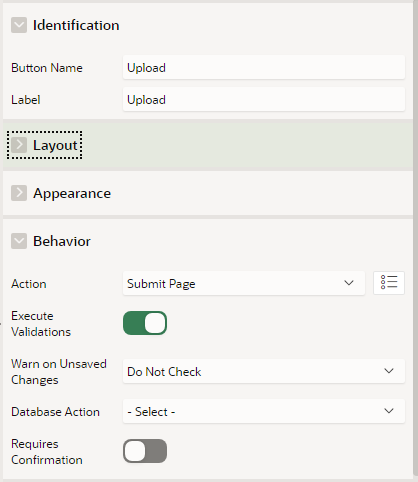
Then on the Processing tab in APEX Builder, add a new process, give it a name and select the Plug-in in the type drop, in this case Azure - Put BLOB. In the settings region enter the Page Item name created above for the filenames using the &P2_ITEM. syntax. Also, enter any text string for the reference object type and a number for the ID, optionally, enter a Delete after date. Finally set the serverside condition - "when button pressed" option to the name of the button created earlier.

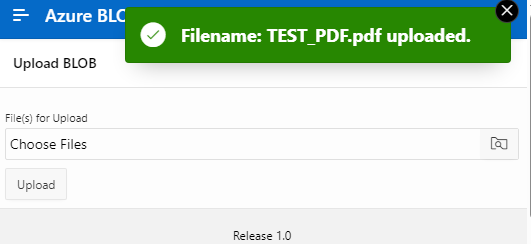
That's all we need to do to test the upload. Run the page and you should get something like this.

Select a file or several, in my case they must be PDFs, then click on Upload. If all works well you should see a success message.
To check on Azure you can use your Azure SAS URL and a browser to list the BLOBs in the container. Just append "&restype=container&comp=list" to the end of it. You should get an xml response showing the file details in the container. For example:

We can also check our local db table to see the details in there.

All looking good, now let's set up the delete BLOB plug-in and test that.
Delete BLOB
To save time copy the Put BLOB plug-in, giving it a new name and internal name, as below.
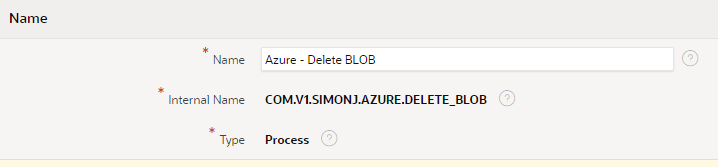
Update the callback function to reference the correct delete_blob function.

Click on Apply Changes button and then go to the Custom Attributes tab. Delete the 4 existing component scope attributes and create a new component scope attribute for the File ID. You should end up something like this.

We must now add the Azure SAS URL for this plug-in, see the same step for the last plug-in.
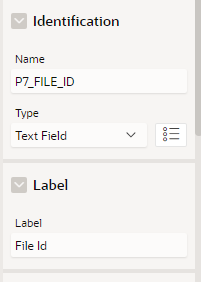
Create a new modal APEX page called Delete BLOB, with a single page item named PX_FILE_ID.
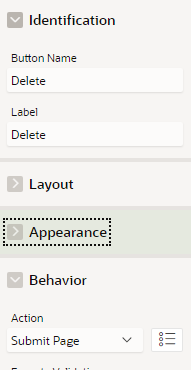
Add a button, named Delete, with a Submit Page Action
Add a page process, name it Delete BLOB, and select the newly created plug-in from the list. Enter the Page Item for the File ID using "&." notation in the settings and set the Server side condition of "when button pressed" to Delete.

We will call this modal page from another page by clicking on a link in a report.
Create another page using the new page wizard select interactive report and use the AZURE_FILES table as a source.
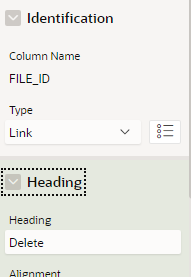
Once created modify the File ID column in the report to a link type. Change the heading to Delete.
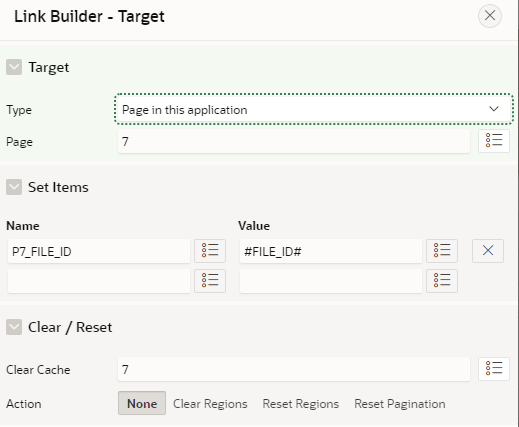
Click on the link Target then select the appropriate page number for the modal page created previously and map the File ID page item to the File ID column.
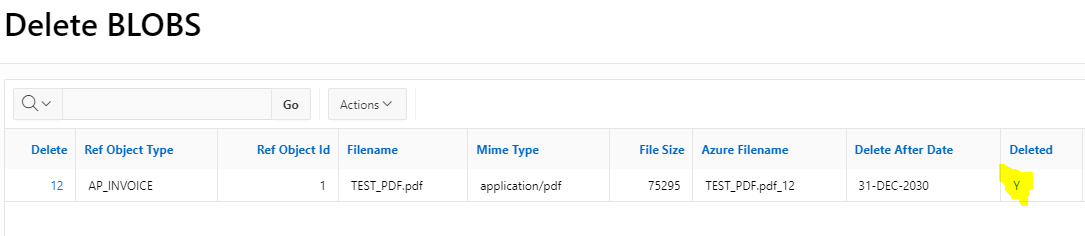
Now we can run a test delete. Run the interactive report page, you should get something like this.

Click on the ID number in the delete column to open the Delete Modal dialog.
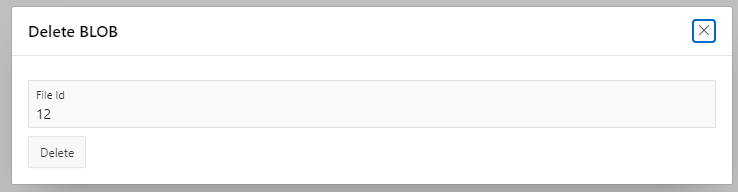
For this blog I've kept the modal very basic but you could show the user the BLOB details and make the page items read-only etc. Click Delete.
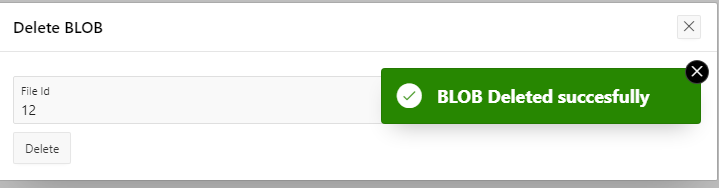
Return to interactive report page and note the Deleted column now shows as Y.
Let's also check in Azure using the same URL as earlier to view the XML list of the container contents.

All looks good BLOB deleted.
Un-Delete BLOB
Copy the Delete BLOB, update the name and internal name and callback function. Custom attributes remain the same.


Apply changes and then update the Azure SAS URL component setting.
Copy the Delete Modal page created previously then change the name to Un-Delete, and modify the process to use the un-delete plug-in. Also, relabel the button to Un-Delete.
On the interactive report page created earlier, change the Deleted column to be a link then set the link to the un-delete page and map the page item and column.
Run the interactive report page and click on the Deleted column value, the new un-delete modal should open.
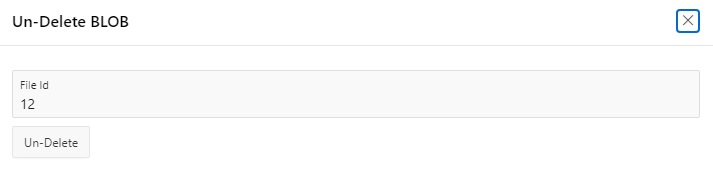
Click Un-Delete
If you're Azure BLOB Storage properties for soft delete are set correctly you should get a success message.
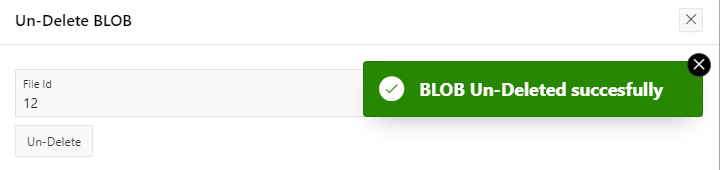
Refresh interactive report to see Deleted = 'N'

Again check in Azure using the same URL as earlier to view the XML list of the container contents. You should the file in the xml again.
Ok so now we can upload and delete and undelete with a plug-in let's take a look at displaying it.
Get PDF
PDFs and image files can be easily rendered in an APEX page, other document types cannot. That's one reason why I restricted the BLOB file types to application/pdf. You can use other file types but the plug-in we are going to create will not display the file simply download it in teh browser instead to be opened by the user.
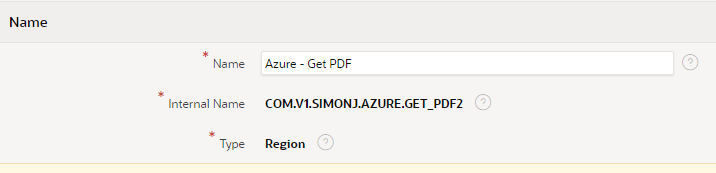
Create a new plug-in from scratch, give it a name and an internal name and select the type as Region.
Set Render Procedure call back as follows.

Save the plug-in then create the following custom attributes, Azure SAS URL, same as previous, and the Azure Filename as below.

Custom attributes should then like this.

As before set the Azure SAS URL for the component.
For this plug-in to work we are going to pass in the Azure Filename. In the code, provided above, this is the original filename with a unique sequence appended to the end. It is stored in the AZURE_FILES table.
In this example, we'll add another column to the interactive report to view PDF which will open a Modal window with the plugin region.
Using the Create page wizard select Plug-in Page
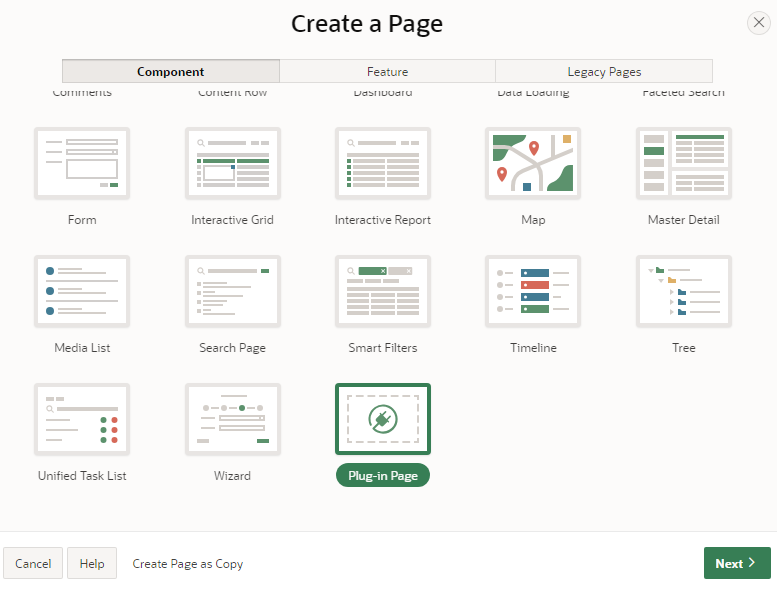
Select our newly created Get PDF Plug-in

Select Modal Dialog for Page Mode and enter AZURE_FILES in the Table/View Name
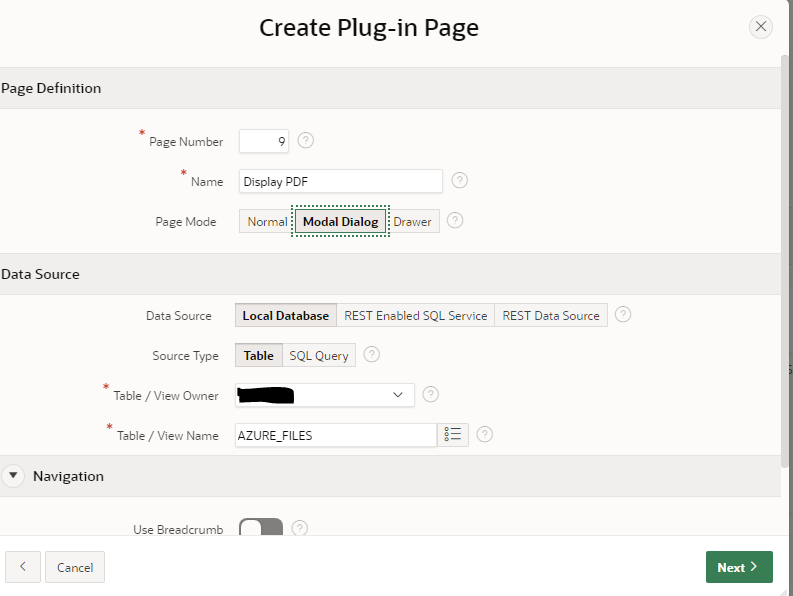
You'll then be prompted to enter the Azure Filename, enter a real value or any value. We will change this to a page item shortly.

Click create Page.
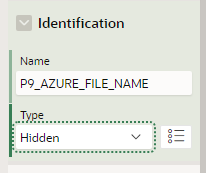
Now add a page item, call it AZURE_FILENAME and make it Hidden
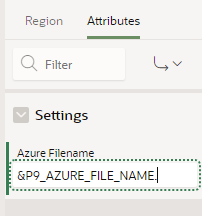
Now click on the plug-in region then click on the attributes tab and replace the Azure Filename with the name of the page item you just created.
Save changes and Navigate back to our interactive report page. Select the Azure Filename column and change the type to Link. Then set the target similar to below.
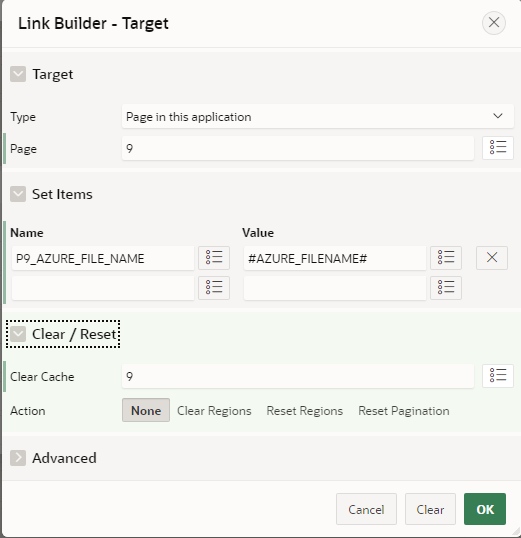
Update the link text attributes as below.
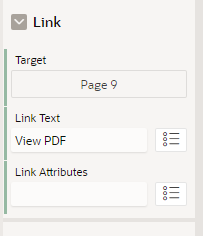
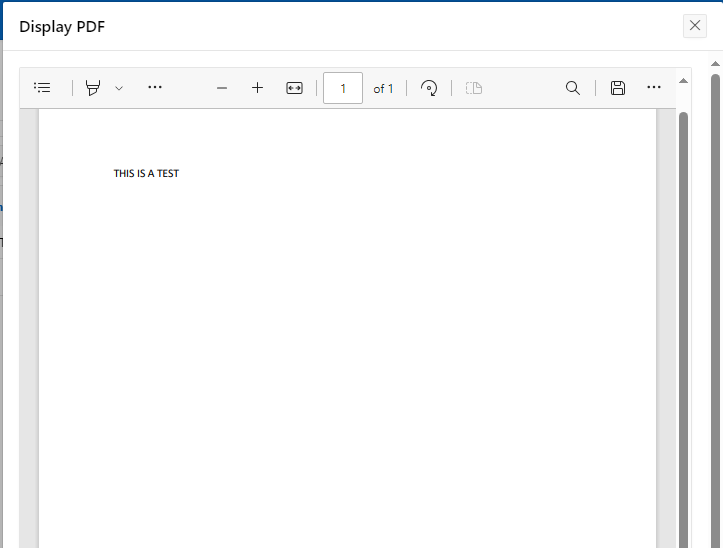
Now try your interactive report and click on the View PDF link

PDF should now be displayed
That's it for now, to download the full sample code go to Azure API Calls from Oracle APEX (github.com) you'll find the DDL script to create the table, sequence and package, along with the plugins to import to an app of your choice.
Hope you found something of interest.


